Introduction
Replacing kitchen cabinets costs thousands of dollars. Most homeowners in Orland Park, IL, feel that financial pinch deeply. The good news is you don’t need to replace everything. Your existing cabinets probably have years of life left in them. With some creativity and effort, they can look completely transformed.
Old doesn’t mean useless. Many older cabinets feature solid construction that beats modern alternatives. The bones are good even when surfaces look tired. This guide shares five proven methods that breathe new life into worn cabinets. Each approach offers different benefits depending on your budget and skills. You’ll discover practical solutions that deliver real results without breaking the bank.
Assessing Your Current Kitchen Cabinets
Before starting any project, examine your cabinets honestly. Open every door and drawer. Check for structural problems like sagging shelves or broken hinges. Look inside cabinet boxes for water damage or mold. These issues need addressing before cosmetic updates make sense.
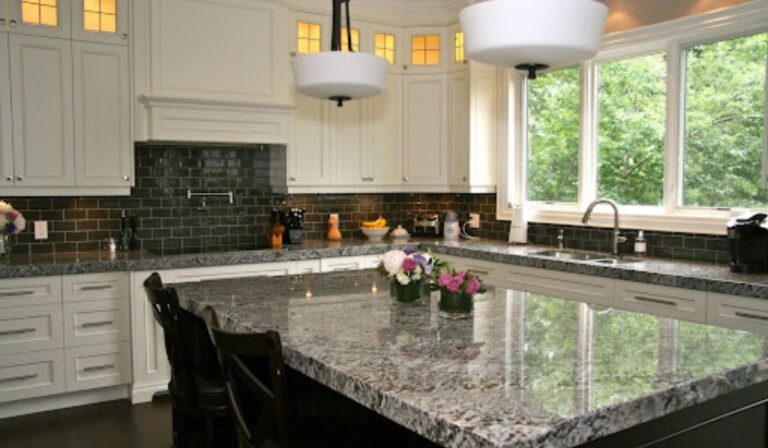
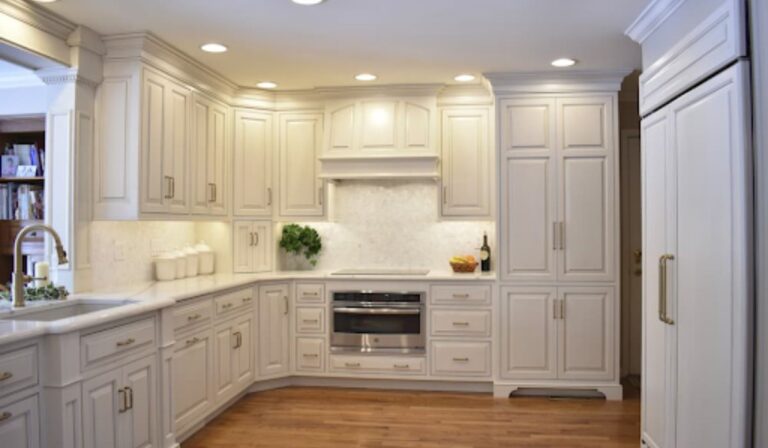
Pay special attention to your base kitchen cabinets since they endure the most wear. They handle heavy pots, frequent opening, and occasional bumps from feet. If the boxes remain solid and doors close properly, you have great candidates for refreshing. Surface issues like scratches, dated colors, or worn finishes are easily fixable.
Identify your cabinet material next. Solid wood accepts stain and paint beautifully. Laminate requires different approaches but still updates well. Veneer sits somewhere in between. Knowing your material guides which methods work best. Take time with this assessment. It determines your entire project direction and prevents wasted effort on unsuitable techniques.
1: Deep Cleaning and Restoration
Never underestimate cleaning power. Years of cooking grease create thick, dingy layers on cabinet surfaces. This buildup makes even quality cabinets look terrible. A thorough deep clean often reveals beautiful wood hiding underneath.
Start with a strong degreaser mixed according to package directions. Warm water helps cut through grease faster than cold. Work in small sections using soft cloths or non-abrasive sponges. Stubborn areas need extra attention with gentle scrubbing. Rinse thoroughly to remove all cleaner residue.
Cabinet interiors need cleaning too. Remove everything and wipe down all surfaces. You’ll be amazed at the grime hiding inside. Clean shelves prevent transferring dirt to dishes and food items. This step takes time but costs almost nothing beyond cleaning supplies.
After degreasing, restore wood finishes with appropriate products. Wood conditioner revives dry, dull surfaces. A quality furniture polish adds protective shine. Oil-based products work wonders on natural wood. These treatments cost little but make dramatic differences. Your cabinets might look new enough that other updates become unnecessary.
2: Painting Your Kitchen Cabinets
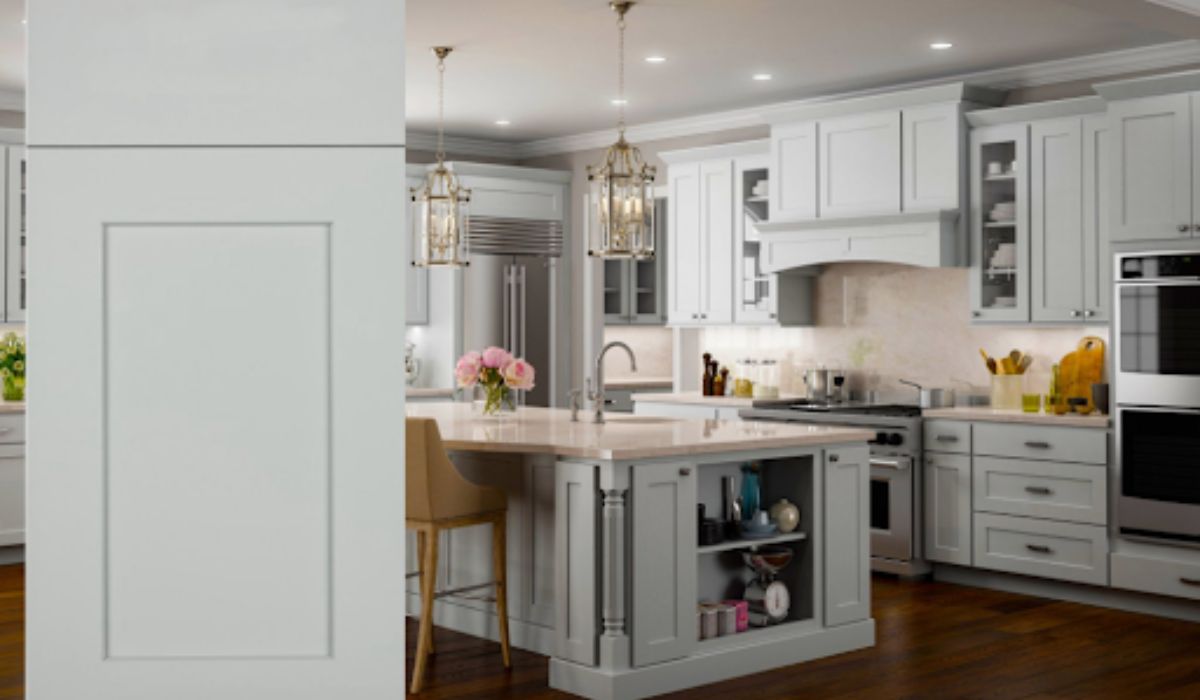
Paint transforms cabinets more dramatically than any other method. You completely change the color and style. White cabinets brighten dark kitchens instantly. Bold colors create stunning focal points. Gray offers timeless modern appeal.
Surface preparation determines paint success more than anything else. Clean cabinets thoroughly first using the deep cleaning method above. Sand all surfaces lightly with 120-grit sandpaper. This roughens glossy finishes so new paint adheres properly. Wipe away all dust with tack cloths before painting.
Prime every surface before applying color. Quality primer blocks old finishes and creates uniform surfaces. It prevents wood tannins from bleeding through light paint colors. Don’t skip this step even when it feels tempting. Primer makes the difference between professional and amateur results.
Apply paint in thin, even coats rather than one thick layer. Thin coats dry faster and look smoother. Multiple light coats build better coverage than single heavy applications. Use foam rollers for flat surfaces and angled brushes for detailed areas. Sand lightly between coats with fine sandpaper for glass-smooth finishes.
Many homeowners wonder about cabinet quality when considering updates. Brands like J&K Kitchen cabinets in Orland Park, IL built reputations on solid construction that accepts paint beautifully. Well-made older cabinets often take better paint than cheap new ones. The key is proper preparation regardless of brand.
3: Replacing Cabinet Hardware
New hardware offers the easiest cabinet upgrade available. Switching out old pulls and knobs takes minutes per cabinet. The visual impact far exceeds the minimal effort required. This simple change modernizes kitchens instantly.
Current trends favor clean, simple hardware styles. Brushed nickel remains popular for its neutral warmth. Matte black creates bold contemporary statements. Brass is making strong comebacks in both polished and aged finishes. Choose finishes matching other kitchen fixtures for cohesion.
Measure existing hardware hole spacing before shopping. Standard spacing is 3 inches center-to-center for pulls. Knobs use single holes. Matching existing holes eliminates drilling new ones. If you want different spacing, be prepared to fill old holes and drill fresh ones.
Installation requires only a screwdriver in most cases. Remove old hardware and clean residue from mounting areas. Insert new pulls through holes from the front. Secure with screws from inside cabinet boxes or drawers. Tighten firmly but don’t over-tighten, which can crack cabinet faces. When selecting new hardware, consider how quality cabinet hardware upgrades enhance both function and appearance throughout your kitchen.
4: Refacing Cabinet Doors
Refacing updates cabinet appearance without full replacement costs. This method works especially well when cabinet boxes remain solid but doors look dated. You replace just the visible parts while keeping existing structures.
The simplest refacing applies new veneer or laminate to existing cabinet boxes. Self-adhesive products make DIY application manageable. Measure carefully and cut pieces slightly oversized. Apply slowly from one edge, smoothing as you go to prevent bubbles. Trim excess with sharp utility knives.
Replacing doors entirely offers more dramatic transformations. Order new doors in updated styles like shaker or flat panel. Many companies sell doors separately to fit standard cabinet boxes. Measure existing door dimensions carefully. Note hinge placement and swing direction before ordering.
New drawer fronts complete the refaced look. These attach to existing drawer boxes with screws from inside. Match door style for consistency. This approach gives you completely new cabinet faces at a fraction of replacement costs. The process requires moderate skills but saves thousands compared to full renovation.
5: Adding Modern Finishing Touches
Strategic additions elevate basic cabinets into custom-looking cabinetry. These finishing touches add character and functionality simultaneously. Choose additions that match your kitchen style and practical needs.
Under-cabinet lighting transforms kitchens dramatically. LED strip lights install easily with adhesive backing. They illuminate countertops for better task lighting while adding ambiance. Puck lights create focused spots perfect for food prep areas. Both options come in plug-in and hardwired versions.
Crown molding fills gaps between cabinet tops and ceilings. This addition creates expensive built-in appearances. Choose molding styles matching your home’s architecture. Simple profiles suit modern spaces while ornate versions complement traditional homes. Installation requires miter cuts and careful measurements.
Glass inserts convert solid cabinet doors into display showcases. Remove door centers and install glass panels instead. Clear glass shows off pretty dishware. Frosted glass hides contents while maintaining light transmission. This update works best on upper cabinets flanking windows or ranges.
Interior upgrades improve function along with form. Pull-out shelves make base cabinets more accessible. Drawer organizers keep utensils tidy. Lazy susans maximize corner cabinet space. These additions cost relatively little but improve daily kitchen use significantly.
Combining Methods for Maximum Impact
The biggest transformations combine multiple approaches strategically. Painting cabinets plus new hardware creates dramatic before-and-after results. Add under-cabinet lighting and the impact multiplies further. Choose combinations fitting your budget and timeline.
Start with the highest impact changes first. Paint usually delivers the most dramatic visual difference. New hardware comes next for modern style updates. Lighting and trim additions can follow as budget allows. This phased approach spreads costs over time while allowing you to stop when satisfied.
Maintain design consistency across all updates. Choose hardware finishes that complement new paint colors. Select lighting temperatures that enhance rather than clash. All elements should support a cohesive vision. Mismatched updates create confused appearances instead of polished transformations.
Professional help makes sense for certain tasks. Painting requires significant time and patience for quality results. Many Orland Park homeowners hire painters for this step. Hardware installation and cleaning remain excellent DIY projects. Assess your skills honestly and get help where needed.
Cost Breakdown and Budget Planning
Understanding costs helps you plan realistic budgets. Deep cleaning costs under $50 for supplies. DIY painting runs $200-500 depending on kitchen size and paint quality. Professional painting costs $3,000-8,000 but guarantees results.
New hardware ranges from $3-15 per pull for basic options. Designer hardware runs $20-50 each. A typical kitchen needs 20-30 pieces total. Budget $150-500 for complete hardware updates. This remains one of the most affordable upgrades available.
Refacing with veneer costs $300-800 for materials in average kitchens. New doors run $50-200 each depending on style and material. Full professional refacing costs $4,000-10,000. This still beats $15,000-30,000 for complete replacement.
Finishing touches vary widely in price. LED light strips cost $20-60 per section. Crown molding materials run $100-300 for typical kitchens. Glass inserts average $30-75 per door. Interior organizers range from $20-200 per item. These additions are optional but worthwhile for both function and value.
Maintenance Tips for Lasting Results
Protect your refreshed cabinets with proper ongoing care. Wipe spills immediately before they set or stain. Use soft cloths with mild soap and water for regular cleaning. Avoid harsh chemicals that damage finishes over time.
Check hardware monthly and tighten loose screws promptly. Loose pulls cause unnecessary wear on cabinet faces. A quick tightening prevents bigger problems. Adjust hinges as needed to keep doors aligned and closing properly.
Painted cabinets need gentle treatment during the first month of curing. Avoid harsh scrubbing until paint fully hardens. Touch up small chips or scratches quickly to prevent moisture penetration. Keep touch-up paint handy for easy repairs.
Proper ventilation protects all cabinet finishes. Run exhaust fans while cooking to remove grease-laden air. This simple habit prevents buildup that dulls surfaces. Your refreshed cabinets will maintain their beauty much longer with adequate ventilation.
Conclusion
Old kitchen cabinets hold tremendous transformation potential. These five creative approaches prove replacement isn’t your only option. Deep cleaning reveals hidden beauty beneath grime. Paint changes everything about cabinet appearance. New hardware modernizes instantly. Refacing updates visible surfaces affordably. Finishing touches add custom details.
Choose methods matching your budget, skills, and goals. Combine approaches for maximum impact. Take time with preparation for professional-looking results. Your kitchen deserves this attention. The investment in refreshing cabinets pays off through improved daily enjoyment and increased home value. Start with one method and build confidence. You’ll be amazed at what’s possible without replacing everything.
FAQ Section
How much does it cost to make old cabinets look new?
DIY cleaning and painting costs $200-500 for average kitchens. Professional painting runs $3,000-8,000. Hardware updates add $150-500. Refacing costs $4,000-10,000 professionally or $300-800 DIY.
Can you paint kitchen cabinets without sanding?
Not recommended. Light sanding ensures proper paint adhesion. Skipping this step leads to peeling and chipping. Use 120-grit sandpaper for quick, effective surface preparation.
What is the easiest way to update old kitchen cabinets?
Replacing hardware offers the simplest update. It takes minimal time and requires no special skills. New pulls and knobs modernize kitchens instantly at low cost.
How long does painted cabinet finish last?
Properly painted cabinets last 10-15 years with good care. Quality paint and thorough preparation extend lifespan significantly. Regular gentle cleaning maintains appearance throughout.
Is it better to paint or reface kitchen cabinets?
Paint costs less and offers unlimited color choices. Refacing changes cabinet style and lasts longer. Choose painting for budget updates and refacing for style transformations.
Also, read: Can a Weighted Blanket Really Improve Your Sleep Quality